How-Tos
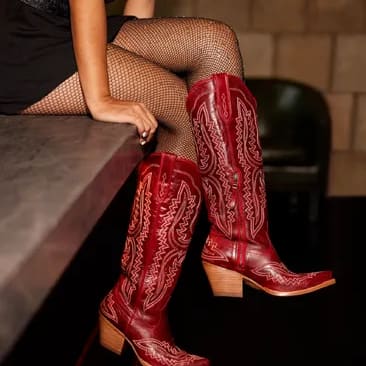
How to Fix Scuffed Leather Boots & Shoes
Learn how to fix scuffed leather boots with our step-by-step guide and bring your boots back to life.
Leather shoes and boots are not only stylish, but they are seriously long-lasting. They’re an investment in your look that could save you money in the long run. Why? With proper care, a good pair of leather shoes can last a lifetime, adapting to our lifestyle and becoming a part of who we are. Unfortunately, scuffs on leather shoes and boots do happen. And it can be daunting to figure out how to fix them. (Seriously, what happens if you ruin your shoes even more?) Don’t be nervous. This guide will show you how to fix scuffs in leather boots and shoes.
You Will Need:
- For minor scuff repair
- A hair dryer
- Leather cleaner
- Unscented, undyed petroleum jelly
- A clean colorfast or undyed cloth or towel
- Recoloring balm in the color of your shoes
- For gouges and deep scuffs in leather
- Leather cleaner
- Color-match leather dye kit
- Leather sealer (matte or glossy, depending on the finish of your shoes)
- 2 clean foam brushes or sponges
- 1200-2000 grit sandpaper
- Disposable mixing cups
- Heavy leather filler
- Disposable plastic knife
- To prevent future scuffs on your shoes
- Leather cleaner
- Leather conditioner
- Shoe polish
- Shoe wax
Step By Step: How to Fix Light Scuffs on Leather Boots and Shoes
Step 1: Clean the surface
First thing’s first — you gotta get these shoes or boots clean for any repairs to work. You’ll want to clean the surface of the shoes around the scuffed area with leather cleaner to get rid of any dirt or debris. (Pro tip: Before using the leather cleaner, make sure to first test it on an inconspicuous spot before applying it all over).
Step 2: Heat the scuffed area lightly with a hair dryer
Just like our skin, leather is affected by changes in temperature and humidity. Heating the leather makes it more malleable, allowing you to blend any uneven surfaces in the leather together. Apply some heat with a hair dryer, but don’t go full blast—use light heat, as getting the leather too hot could cause it to scorch or constrict and warp. Basically, if it’s too hot for your hand, it’s too hot for your leather.
Step 3: Massage the scuffed area with a clean cloth or towel
After heating the leather surface with your hair dryer, use a clean cloth to massage the leather in a circular direction. It’s okay to give it a bit of pressure—leather is quite durable. The goal of this massage motion is to soften the edges of the scuff, while also bringing out some of the dye in the surrounding area to blend the colors and textures together, making the scuff diminish in appearance or disappear entirely. (Like a magic trick.) If the scuff is gone after this step, apply a good leather conditioner to your shoes and admire your work, you magician.
Step 4: If the scuff is still visible, apply petroleum jelly to the surface of your shoe
Unfortunately, sometimes buffing leather isn’t enough to get out a scuff in leather boots, especially if it covers a larger area. In this case, the next step would be to apply petroleum jelly to the scuff. This enriches the leather, moisturizes it, and makes the color within the scuff more vibrant to match the surrounding leather. Just note, this won’t work with all leathers. So don’t be discouraged just yet.
Step 5: If petroleum jelly doesn’t do the trick, use a color-matched leather balm
Sometimes petroleum jelly isn’t enough to get the results you want out of your repair. If you can still see a difference in coloration in the scuffed area, clean the surface once again with leather cleaner and apply a color-matched balm to the scuff. Rub the balm in with a clean cloth in a circular direction, feathering the color of the balm into the color of your shoes. Once the balm has dried, apply leather conditioner to the shoe to seal in the color. Boom, done.
Step by step: How to Fix Gouges in Leather Boots and Shoes
If the damage to your boot is more severe than a light scuff, you will need to take more extreme measures to repair them. These steps will allow you to fix most shoe damage, besides blatant holes. Sorry, we’re not that magical.
Step 1: Clean the surface
Like before, the first step in leather repair is making sure you have a clean surface to work with. Clean the area well, as the repair will fail without a properly cleaned surface. If using a leather cleaner, make sure to first test it on an inconspicuous spot before applying it all over. Leather repairs are incremental, and the better job you do at prep, the better the finished result will be. Promise.
Step 2: Apply color-matched dye to the gouged area
Leather dye kits come with a base color and a tint color. The base color is usually black or brown, and there are a variety of tint colors that you add into the base to match the color of your shoes. (Some shoes may need a brown base color and a few drops of yellow tint, for instance.) After mixing your dye, apply a small amount to a foam sponge or brush and dab the color to the scuffed area, starting from the center and working out. It’s important to dab and not brush, as brushing will leave streaks that will be apparent in the finished repair. After dabbing on the dye, either allow the leather to air dry or use a hair dryer to dry the area.
Step 3: Fill the gouge or scratch with heavy leather filler
Using a plastic knife, fill the scratch or gouge with leather filler, pressing the filler into all of the crevices in the damaged area. Don’t be shy. After the area is completely filled, smooth out the filler with the knife as best as you can, as this will save you time sanding later. Allow the filler to dry according to the directions on the filler package, or use a hair dryer to speed up the process. (Reminder: Do not use full blast.) After the filler is dry, repeat the process of adding filler and drying until the top layer of filler either matches or is just a shade darker than the surrounding areas.
Step 4: Sand the leather filler
After the filler has dried completely, sand the filled area with a low grit sandpaper, like 1200 grit, until it’s smooth and matches the undamaged area. Periodically wipe down the area with a clean cloth and run your finger across the surface to feel for imperfections. If your shoes are particularly smooth, or if you have patent leather, it’s a good idea to follow up with a higher grit sandpaper (1500 to 2000) to remove the scratches left behind by the lower grit. Once you’re satisfied with the filler, you’ll want to clean the area again with leather cleaner.
Step 5: Apply more color-matched dye
Now that the gouge in your shoe has been filled, it’s time to apply the color. Using the dye from step 1 that you’ve already matched to the color of your shoe, dab the dye on lightly, starting from the center of the repair area and working out. Starting from the center puts the highest concentration of dye directly on the repair and feathers the dye out to the surrounding areas to blend the color. Allow to dry (or use a hair dryer), and then apply at least one more coat.
Step 6: Mix and apply leather sealer
Leather sealer comes in both glossy and matte finishes, and can be mixed in different ratios to match different levels of sheen in a leather shoe. Your shoe may be a satin finish and have a light shine to it. In this case you would start with a ratio of gloss to matte finish of 1:1 and adjust as needed as you apply the sealer. Just as you did with the dye, apply the sealer to the repaired area with a new foam sponge or brush, dabbing from the center and working out. Allow the sealer to dry or use a hair dryer to dry it. If the sheen of the repair doesn’t match quite right once the sealer has dried, adjust the ratios in your mixture as needed. Apply at least two coats of sealer to the repaired area, allowing to dry between coats. Once the last coat of sealer has completely dried, liberally apply your favorite leather conditioner to your shoes.
And that’s all there is to it. (It’s almost like having brand new shoes, no?) In order to help prevent scuffs in the future, it’s important to polish, condition, and wax your leather shoes on a regular basis. It’s not possible to entirely prevent scuffs and scratches, but with proper treatment and care your shoes can age with you and become a core part of your look.